24. The Ultimate Koi Pond
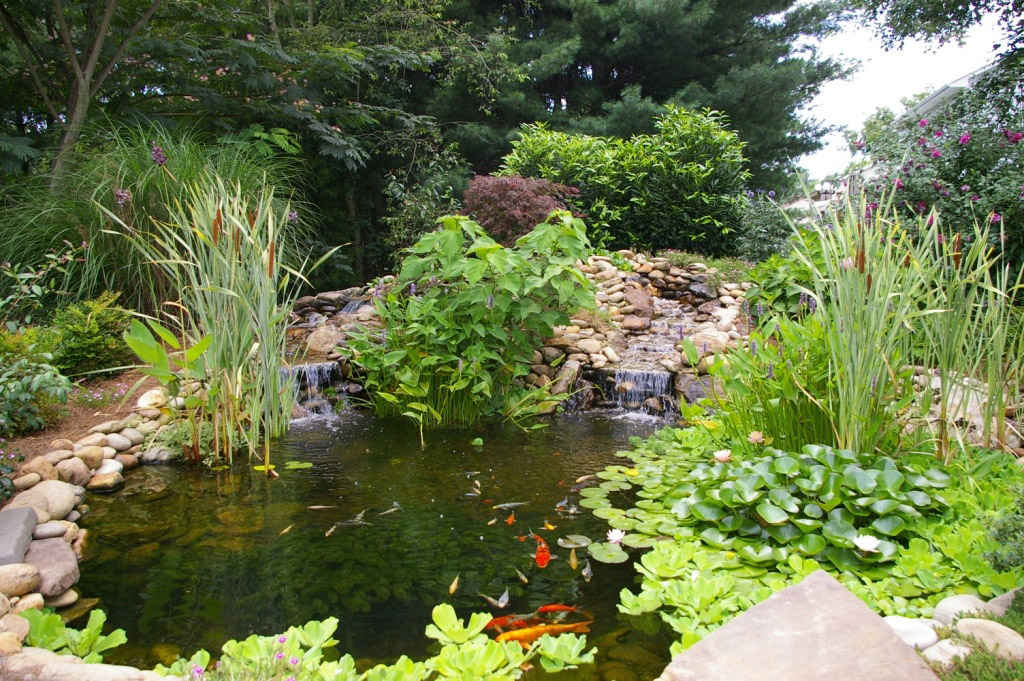
Most people who cultivate an interest in water gardening at some point decide to add fish to the pond. Many keepers are delighted with their pond fish, especially Koi. Koi are large enough and tame enough fish that people collect them and consider them special pets. Any pond with adequate filtration can house these beautiful fish, but a pond designed from the beginning to showcase Koi is one in which plants take second stage. With some of these elegant pets fetching lofty sums of money, few keepers want a pond that sacrifices water quality or impede the viewing of these magnificent specimens. A little planning ahead for facilities and equipment to house these special fish pays huge rewards in years to come. Find out now how to create the ‘Ultimate Koi Pond’.
Important points to consider for the Ultimate Koi Pond:
• Koi grow rapidly, easily reaching 24+” at maturity, and add an increasing burden on filtration systems as they age.
• Water clarity is important for viewing these beauties.
• Water depth is important – deeper ponds with adequate hiding places work best for the protection of valuable fish.

Recommended equipment:
Gravity Flow Filters – These filters are installed outside of the pond and incorporate mechanical and biological filtration to eliminate dirty pond water. These rugged filters feature progressive, staged filtration and are designed to cultivate and support large communities of beneficial bacteria to keep the pond healthy, clean, and thriving.

Pressurized Pond Filters – These filters provide mechanical and biological filtration for crystal clear water and active beneficial bacteria support. These filters are sealed allowing them to be installed above ground or partially buried in the landscape or behind a waterfall. Pumps for the filters are generally submerged. Some units include UV sterilizers.
FiltoClear Pressure Filter
The FiltoClear pressure filter is a compact all-in-one pond filtration system with the fastest and most convenient cleaning mechanism on the market. They include a built-in UV clarifier with bypass for optimal efficiency at low power usage. The built-in cleaning mechanism makes filter maintenance possible in a matter of minutes. FiltoClear systems can be installed unobtrusively by burying most of the body below ground. In addition to traditional step barbed fittings, FiltoClear filters come with Schedule 40 glue fittings that work with both 2” and 1-1/2” flexible & rigid PVC.

• Up to 3000 gal
• UV: 18W
• Max. Pump Capacity: 2000gph (min)

• Up to 4000 gal
• UV-Clarifier Wattage: 24W
• Max. Pump Capacity: 3000gph

• Up to 8000 gal
• UV-Clarifier Wattage: 55W
• Max. Pump Capacity: 4000gph
Easy Clean technology
Rotary switch on “Filter” :
1. Water flows through the filter foams which clarify the water
2. The water passes through the integrated UVC, removing harmful single cell organisms from the water
3. The water is returned back to the pond
Rotary switch on “Clean”:
1. Turning the rotary switch activates the cleaning function
2. Pull the cleaning lever up to squeeze the filter foams. Simultaneously, water flows into the filter and forces the polluted water out of the unit.

UV Sterilizer
To ensure perfect clarity, a UV should be installed to eliminate the unicellular algae that, in large numbers, frequently cause the water to take on a green appearance. This also helps control other forms of algae. Make sure the flow going through your UV is correct for its ratings. The Oase Pressure filters have UVs and addition UVs can be added to the ScreenMatic and other gravity filters.
• Inspection window-the function of the UVC bulb and self-cleaning feature can be checked at any time through the inspection window
• Adjustable flow control: optimizes water flow through the UVC chamber
• Automatic cleaning rotor: continuously guided around the quartz glass tube by the water flow and prevents debris from settling on quartz glass
• High quality UVC: the use of high quality UVC bulbs guarantees a long service life, and a constant effective irradiation capacity
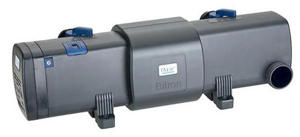
Bitron C 110 – suitable for ponds up to 18,000 gallons in conjunction with the OASE flow-through filters, ProfiClear and Biotec ScreenMatic
Bitron C 110 – suitable for ponds up to 36,000 gallons in conjunction with the OASE flow-through filters, ProfiClear and Biotec ScreenMatic

Vitronic 9 – suitable for ponds up to 2,500 gallons
Vitronic 18 – suitable for ponds up to 5,000 gallons, can be installed on BioSmart
Vitronic 36 – suitable for ponds up to 10,000 gallons, can be installed on BioSmart
• Clear tubing adapters show the clarifier is working
• Easy maintenance: quick release for easy bulb change and cleaning of the quartz glass
• Visual function check: safe and easy monitoring of UVC bulb with an indicator light
• High quality UVC bulbs: the use of high quality UVC bulbs guarantees a constant effective irradiation capacity
• Easy installation on the BioSmart: Vitronic 18-36 W can be easily installed on the housing of the BioSmart 5000-10000 filters

Danner Submersible 10 watt UV Sterilizer
Danner Submersible 20 watt UV Sterilizer
Danner Submersible 40 watt UV Sterilizer DA8451

Pump Choices
Pump selection is crucial for these systems. The best pumps are reliable, have high flow rates, and are economical to use. Your pets’ lives depend on the oxygen and biological filtration your pumps provide. Two pumps are always better than one. A second pump can power additional filtration and surface skimming and also serve as a back up pump.
All large pumps should be run with 1-1/2” rigid or flexible pvc pipe. Spa hose is a great alternative to rigid pvc pipe and is easily glued into standard fittings.
See Choosing a Pond Pump for a comprehensive review of great pumps. Pay particular attention to the Oase pumps.

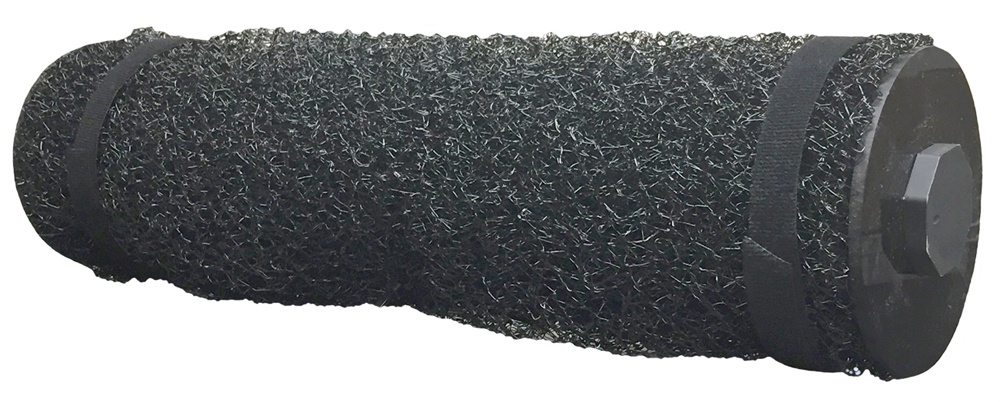
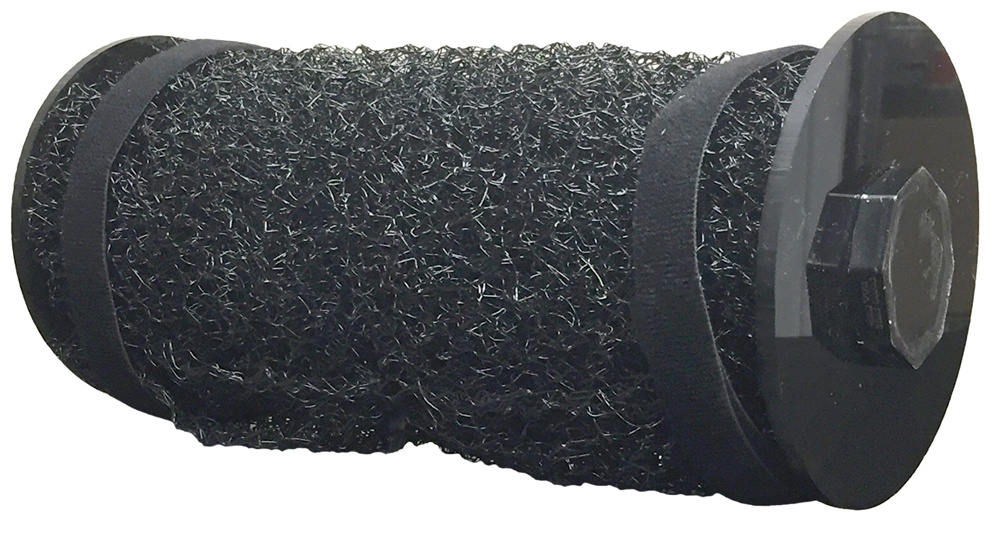
Intake Screen Pond Filter – This handy, easy to clean pre-filter acts as both a filter and as an intake screen to catch debris that would otherwise be drawn into and possibly damage the pump. These units are designed to prevent the pump from clogging over a long period of time and should be used on the inlet side of all pumps. Can be used as a stand alone filter in smaller ponds, or in combination with external filters for maximum cleaning.

Surface Skimmers
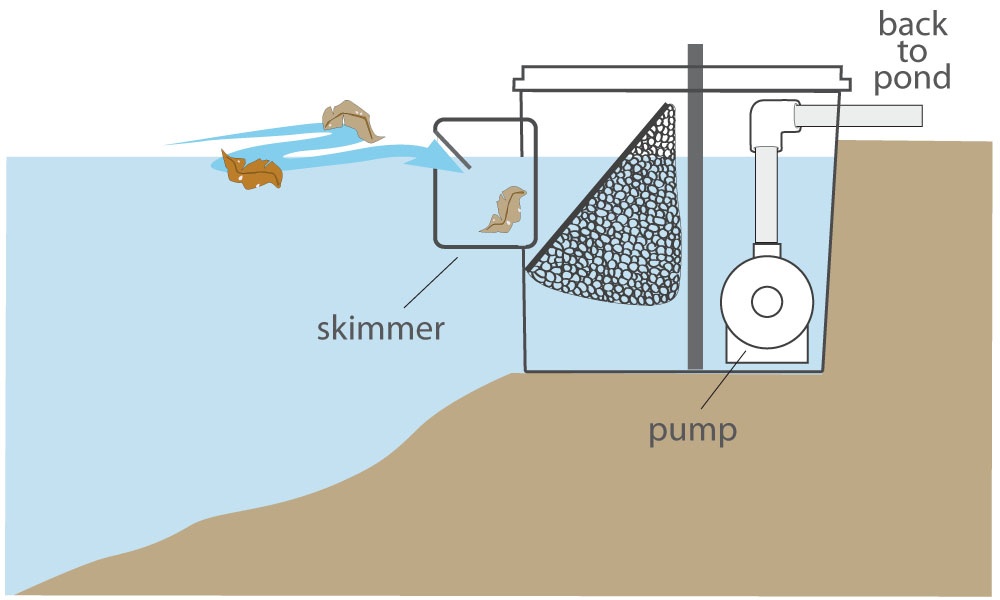
Surface Skimmers – Skimmers are an efficient, convenient and effective way to create a beautiful water garden by removing unwanted grass, leaves, and other debris. They can be used on any size water garden or Koi pond and can be installed during pond construction or added to an existing pond. The skimmer can also be connected to a Pond Beast, an external pressurized filter, a UV sterilizer or waterfall filter, for a complete and efficient system. Surface skimmers are slightly more difficult to install than other types of filtration, but the better units shown below come with advanced instructions and often installation videos.

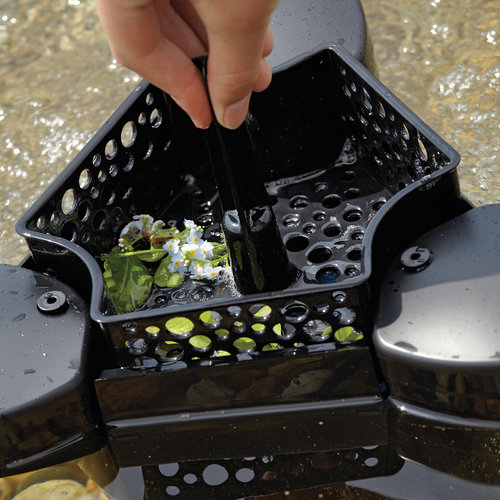
The SwimSkim surface skimmer will do the hard work for you! It offers strong suction, does not require a separate pump and is ideal for retrofitting. Its powerful suction cleans a pond surface (coverage up to 270 square ft.). The SwimSkim floats along the surface of your pond, removing large debris. It is easy to use – just plug it in and drop it in your pond. It automatically adapts to any water level (from a 16 inch water depth). The integrated aerator oxygenates your pond. Because the SwimSkim does not require a separate pump, it’s compact design makes it ideal for retrofitting and allows for flexibility when water level fluctuates.
SwimSkim Pond Surface Skimmer


Added Aeration
The system described above provides superior mechanical, biological and algae killing filtration for a heavily loaded ponds. The dual filtration system adds a huge biological capacity and maintains crystal clear water. An additional UV sterilizer can be added but is rarely needed. Twin pumps and or added aeration serve as a fail safe in the event of a pump failure. You are now on your way to the ultimate koi pond.

Installation
The diagrams below illustrate the recommended installation of the equipment described above. Drawings are not to scale.
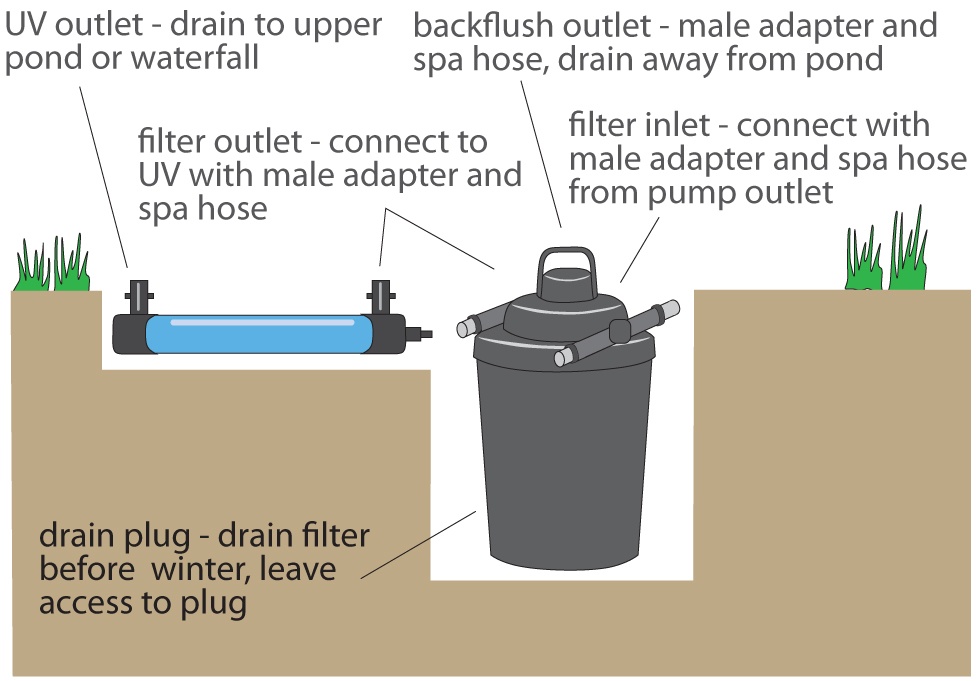
Filter and UV Installation and Hook Up
Both the filter and the sterilizer can be hidden below ground or in a large irrigation box – just leave access to inlets and outlets for cleaning and maintenance. Serviceable parts that remain visible can be hidden with mulch and stonework. Both the filter and UV require winter care and must be drained before the onset of sub-freezing temperatures. The Oase Pressure filters already have UVs in them so addition sterilizers may not be needed. Match the UV to pump flow recommendations.
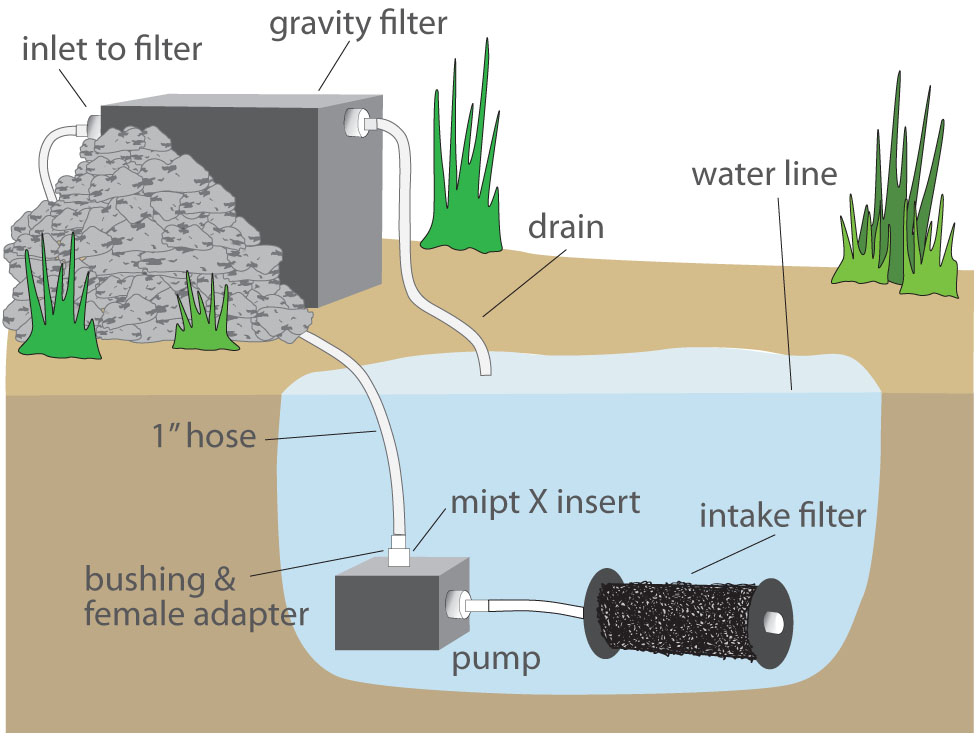
Gravity Filter and Intake Filter Installation
The Gravity Filter must be installed with the drain lines above the surface of the pond. The filter can be placed virtually anywhere and rocked in, buried or hidden in the landscape as illustrated below. In the diagram, a filter is installed in combination with an Intake Filter and a pump with plumbing and tubing required for hook up.
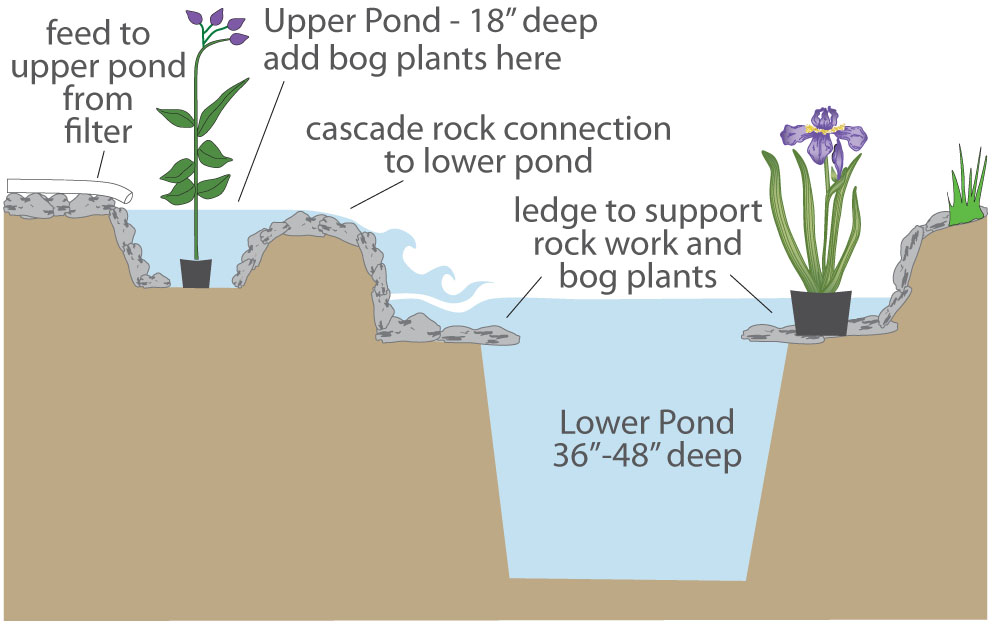
Cross-section showing the relation of the Upper Pond to the Lower Pond
The upper pond functions as a natural filter and gravity drains to the lower pond. This pool should be planted with bog species like water iris and water mint and fast growing plants like water lettuce and water hyacinth, when available. These reduce phosphate and nitrate levels, thus increasing water quality.
Rocking the walls of the pond to hide the liner is acceptable but rocking or graveling the bottom of the pond should be avoided. Rocks and gravel trap waste, prevent cleaning, and create pockets of pathogenic bacteria which eventually lead to fish death. Placing a few large, smooth river rocks at key points on the bottom can help hide the liner without trapping wastes and causing cleaning problems. Rock work can also be supported by a ledge, as shown below, to help hide the liner.
Keep shallow water plants on plant shelves and keep soil covered with large gravel. Lilies should also be protected with large gravel. See Bog Garden Solution.
External Pump Installation
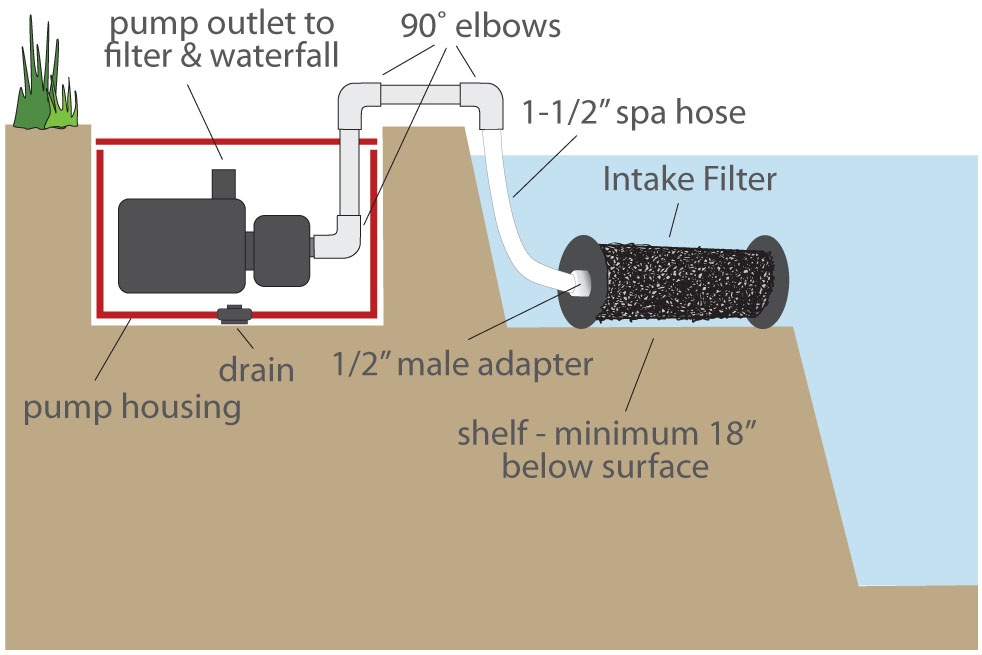
The illustration shows an external pump and protective housing. The housing can be an irrigation box or any self-made container large enough to accommodate the pump and still leave room for periodic maintenance. The housing must be equipped with a drain to avoid standing water from storms. Cover the pump and housing with a lid that allows heat to escape.
Connect 1-1/2″ non-kink hose, the Intake Filter with a 1-1/2″ male adapter. Three 90° elbow fittings complete the loop out of the pond, across the ground and into the housing to the pump.
Many large external pumps are available for use with priming pots which make starting the pump easier. Priming pots should be enclosed in the housing also.
Top View of the Ultimate Koi Pond Operated with 1 Pump
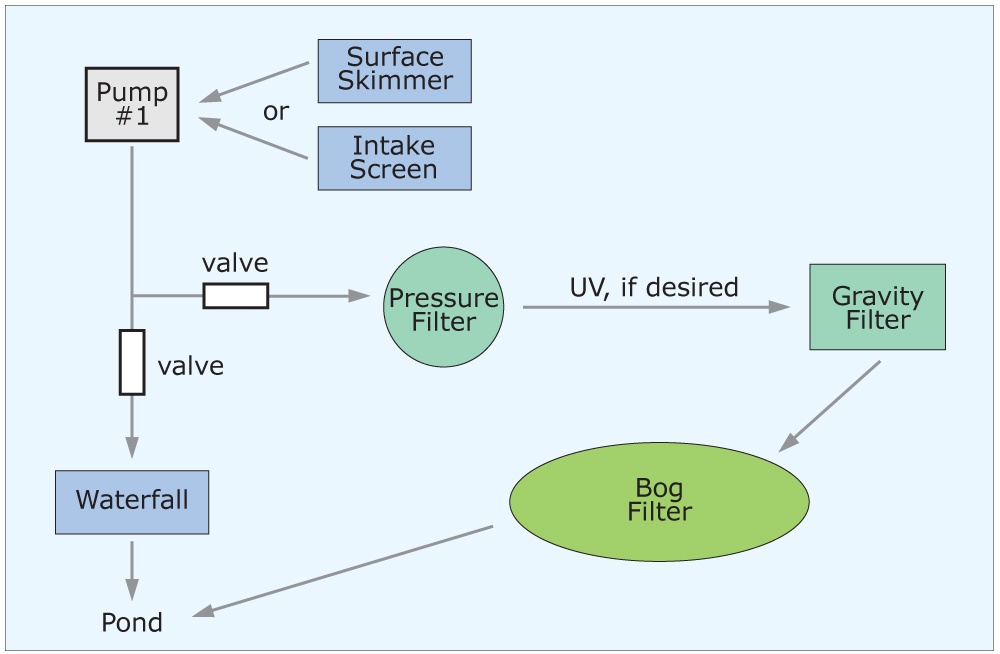
This diagram outlines the equipment and plumbing schematic for powering the system with a single pump. Depending on the size of pump, either internal or external, the pressure filter is optional. If a submersible pump is desired, use the Oase Eco Premium cage pump with option Intake Filter. The diagram shows both an external and submersible pump for reference.* Optionally an Oase Waterfall pump or Eco Classic cab be used.
In this installation an additional T and valve are required in the line to the gravity filter. The gravity filter can drain to either the upper or lower pond depending on location. A valve may be necessary to cause a little back pressure at the waterfall.
The upper pond acts as a natural plant filter and should be well stocked with water hyacinth, water lettuce, iris and pennywort to reduce phosphate and nitrate to increase water quality. This type of installation is used when the filter cannot be hidden at the higher elevation of the upper fall or pond or the gravity filter is not designed to handle the full flow of the pump desired for the water feature.
Top View of the Ultimate Koi Pond with 2 Filters and 2 Pumps
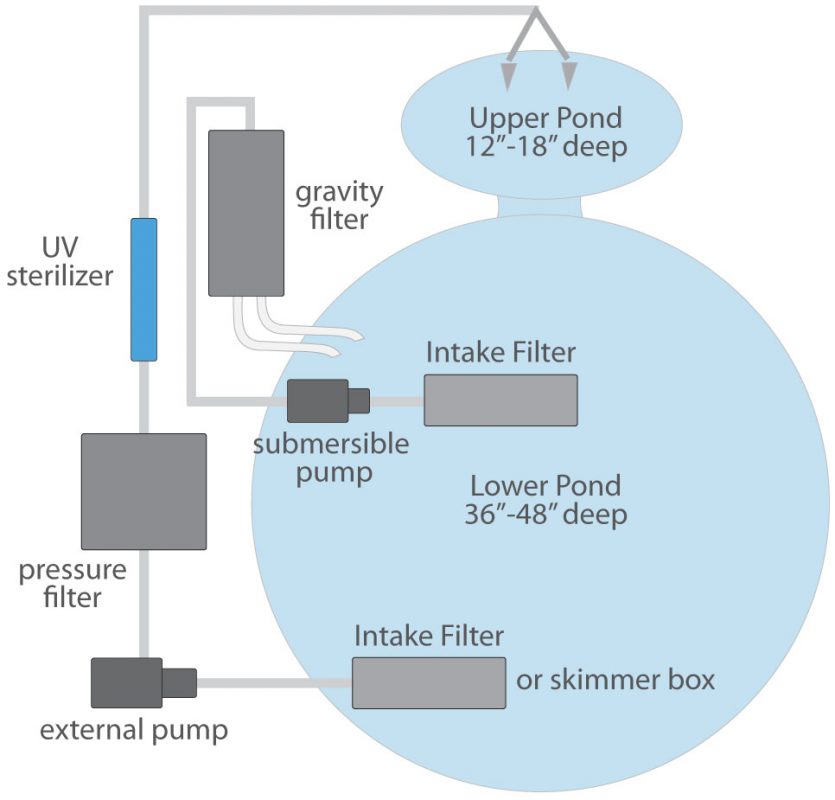
This diagram outlines the equipment and plumbing schematic for 2 filters and 2 pumps. The pressurized filter feeds the upper pond which acts as a natural plant filter. This area should be well stocked with water hyacinth, water lettuce, iris and pennywort to reduce phosphate and nitrate increasing water quality. The gravity filter can drain to either the upper or lower pond depending on where it’s installed.
Installation to Bypass or Remove the UV Sterilizer
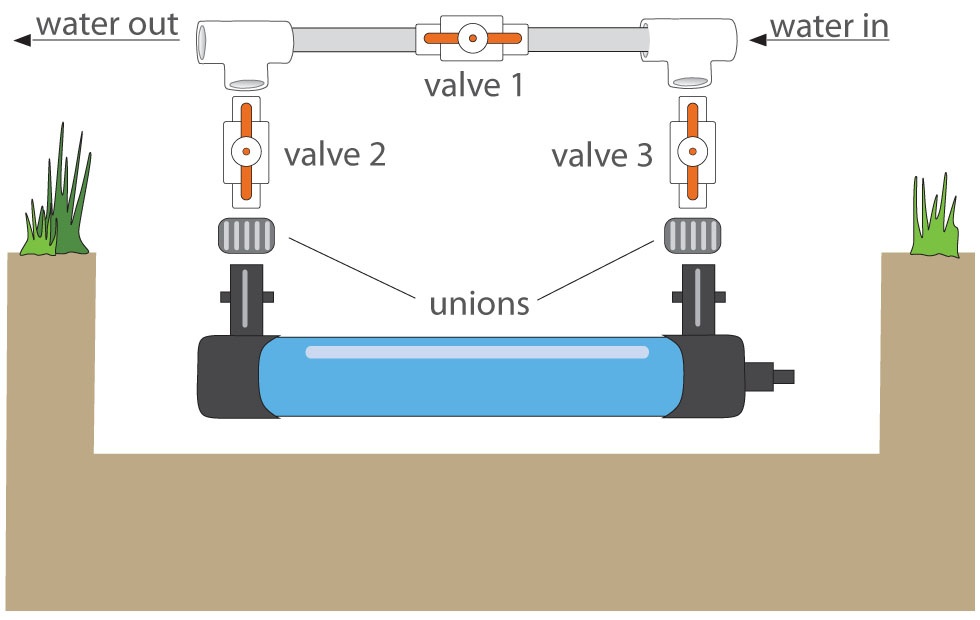
The diagram below illustrates plumbing and installation of a UV sterilizer with valves for bypassing the filtration system. It is necessary to bypass and remove the UV for bulb replacement, adding nitrifying bacteria, regular maintenance and removal from the system in freezing temperatures. In normal operation with the UV on, only Valve 1 is closed, forcing water through the UV to the filter.
• To bypass the UV: open Valve 1 and close Valves 2 & 3.
• To remove the UV: Unions are included with some brands and can be purchased separately. Unions should be installed on the inlet and outlet of the UV before Valves 1 & 2. To remove the unit, open Valve 1, close Valves 2 & 3 and unscrew the unions at the inlet and outlet and remove the unit. In very cold climates, when pumps are turned off, remember to drain plumbing lines and external filters to prevent damage.
Plumbing Schematics for Bog Garden Pump and Skimmer Installation
This diagram shows the same configurations but with one pump.
See Pond Solution 28 for complete instructions for installing a bog garden.


